![]()
|
2018-3-10 main amplifier 2 |
次はYamahaのB2です。これも1977年ごろ買ったものです。
全くうんともすんとも言いません。
Next I fixed Yamaha B2 main amplifier.
It says nothing.
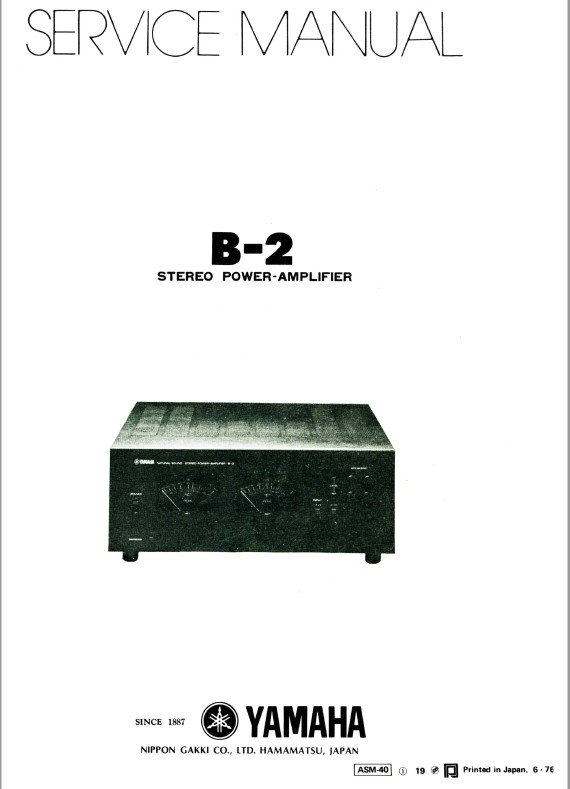 アメリカのhifi engineというサイトででサービスマニュアルを見つけました。 アメリカのhifi engineというサイトででサービスマニュアルを見つけました。https://www.hifiengine.com/manual_library/yamaha/b-2.shtml 登録をすればサービスマニュアルがダウンロードできます。 40ページほどあります。 I got the service manual from here. https://www.hifiengine.com/manual_library/yamaha/b-2.shtml |
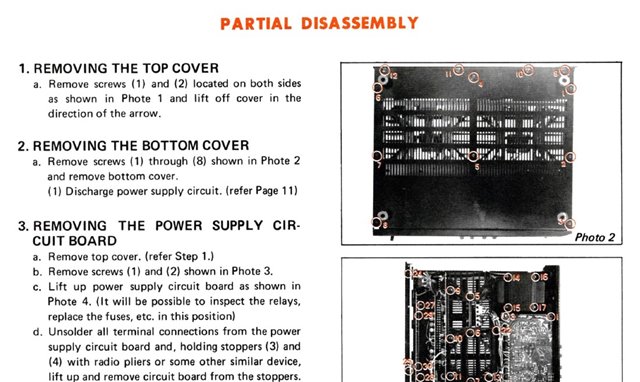 トップカバーのはずし方から始まって、回路の説明、プリント基板のパターンと部品配置、測定点と測定値まで微に入り際に穿って書かれています。 トップカバーのはずし方から始まって、回路の説明、プリント基板のパターンと部品配置、測定点と測定値まで微に入り際に穿って書かれています。This service manual was written in detail. |
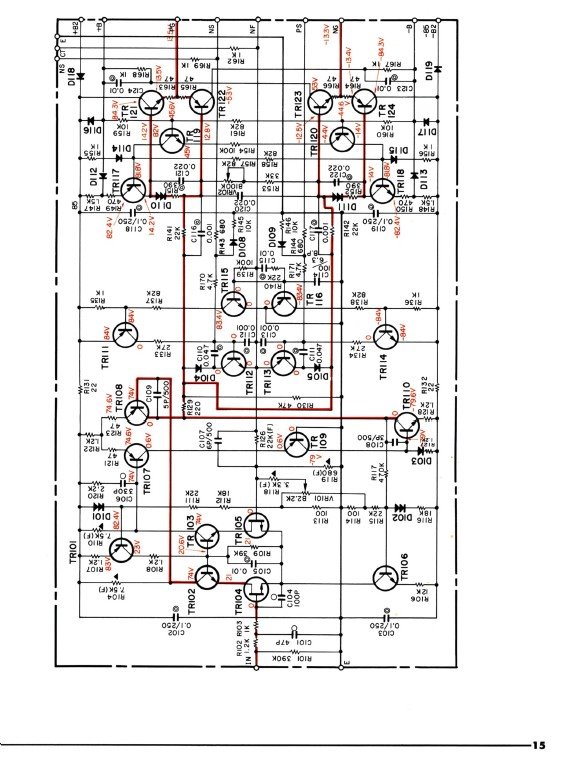 ドライバー回路です。 ドライバー回路です。真空管アンプと比べると複雑です。 トランジスタの劣化は電解コンデンサーの劣化より多いという方もいますが、 とりあえず今回はこの回路には手を出しませんでした。 どこかに破綻をきたして駄目になったら、この機械はあきらめる!ですね。 終段のパワーFETもアメリカのサイトでは箱入り新品が売られているようですが、4ペアー買うと10万近くになりますね。 Driver circuit. This is far more complicated than vacuum tube amplifier. |
固まってしまって動きません。 無理やり動かしたらスナップ部がポロリと外れて落ちてしまいました。 まずメインスイッチをはずしました。 硬くてやっと動くくらいです。 First I fixed main power switch which was not move. |
disassembling the switch |
arm and switch |
Disassembling the switch portion |
赤矢印の軸受け部が固着していました。 この部に少量のマシンオイルを垂らすとスムースに動くようになりした。 青矢印で示す穴に接点用のスチール(下の写真)の棒が入っています。 これが上下して接点と接触したり離れたりでスイッチになっています。 Disassembled. The part shown by red arrow was stuck and a drop of oil released. Metal bars are inserted in the holes shown by blue arrow and they work as contact point. |
左は研磨前、右は研磨したものです。 これをもとに戻して組み込めばスイッチは復活です。 しかし内部構造がわからないうちにスプリングで飛び出してきてしまい、構造を理解するまではうまく組みあがりませんでした。 スライド溝がありそこにちゃんとこの棒がはまらないとスイッチとして機能しませんでした。 Metal bar. Right side is after polished. |
多少短くなっても大丈夫なので受けのほうに溝を切りはめ込みました。 Fixed knob |
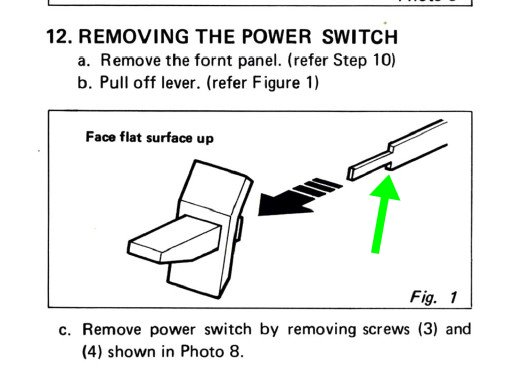 緑矢印の部分が折れてしまいました。 緑矢印の部分が折れてしまいました。折れた物は手前のプラスチック部品内にはまり込んでいて、これを取り出すのもなかなか大変でした。細いピアノ線をL字型に曲げた物で奥から引き抜きました。 The part shown by green arrow was broken |
これでメインスイッチは復活しました。 数日かかりましたね~。 Silver soldered on the fixture to prevent over heat. |
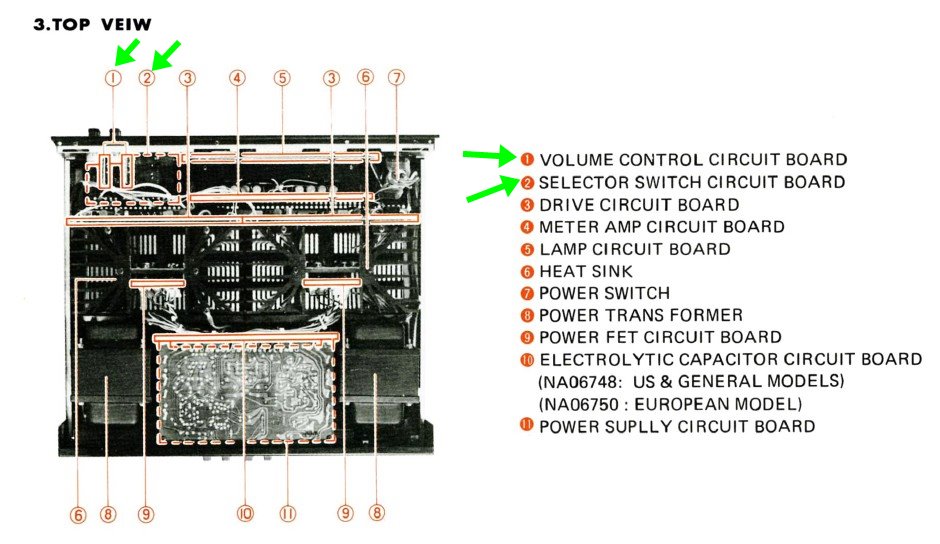 次は1.2のボリュームとセレクタースイッチ基盤部の分解です。 次は1.2のボリュームとセレクタースイッチ基盤部の分解です。あちこちのサイトで見るとここの接触く不良が多いようです。 私のものもオシロで入力をたどっていくとここで止まってしまいます。 Next I fixed the selector switches. |
ボリュームをフロントパネルから外しコネクターをはずすとセレクタースイッチ基盤も出てきます。 基盤についているリードも全部はずします。 自分で作ったものでないのでおっかなびっくりでなかなか先に進めませんでした。 Volume circuit board and selector switch circuit board |
| ずいぶん汚れています。 close up view. It was very dirty. |
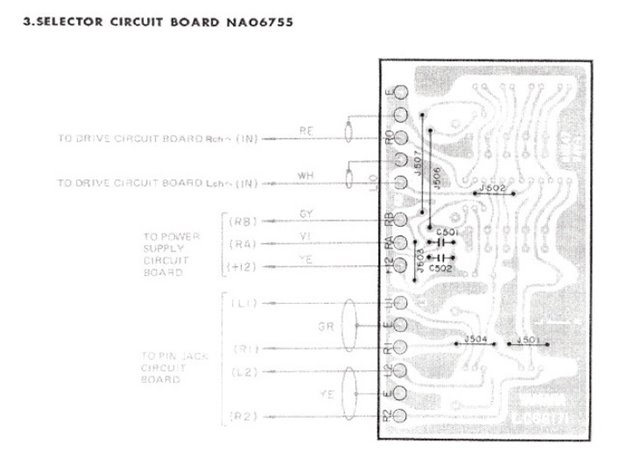 この部分の回路図とプリント基板図はどういうわけか上に示したサービスマニュアルから漏れていました。 この部分の回路図とプリント基板図はどういうわけか上に示したサービスマニュアルから漏れていました。はじめは気が付かなくて探しました。 他で見つけてこの部分が落丁していることに気が付きました。 別のサイトで見つけたものです。ちょっとわかりにくいですが、実物と照らし合わせると何とかわかりました。 In the service manual shown above I could not find the selector circuit board and I had to find another service manual In the same site I could find another service manual. |
| Cleaning the circuit board and de-solder the selector switches. To de-solder all points, it took only about 10 minutes, but it took several days to decide to de-solder them, because it was not my work. |
| 真っ黒でした。きれいにします。メチルアルコールと#6000という超微細ペーパーを使いました。 これも構造がわからないためはじめはおっかなびっくり。 金色に輝いている部分が接点上をスライドします。 しかしこの部品は非常に薄いので組み付け時にちょっと無理な力がかかると変形してしまいます。 一個変形させてしまい、なおすのに非常に苦労しました。 実体顕微鏡下で細ーい攝子で何とかなおしました。 あまりやりたくない作業です。 スライドスイッチは4個もあるので最後の方はだいぶスムースに作業できました。 The contact point of the selector switch. They were very dirty. I cleaned them with methanol and #6000 sand paper. |
| 汚い部分です。 Between the dirty contact point |
| 全部ばらしてきれいにしました。 あとはもとどおりにくみつければOK です。 このほかメーター用照明(6Ⅴ麦球)が一つ切れていましたので、似たようなものに交換しました。 後は手を付けませんでした。 After cleaning |
| これをシャーシ側にウレタンスポンジで張り付けフロントカバーの直径1mmほどの穴に合わせなければなりません。 運まかせの作業は避けてコネクターで接続することにしました。 Main power indicator LED and power protection indicator LED are about 1mm in diameter and they set on the out side of the main chassis. To fix the in precise position is almost impossible without any fixture, so I decided to use connector. |
| ということでB2は復活しました。 Two indicator LEDs were fixed on the back of main front panel. When I will put off the main front panel, I will disconnect these connectors. B2 was restored |
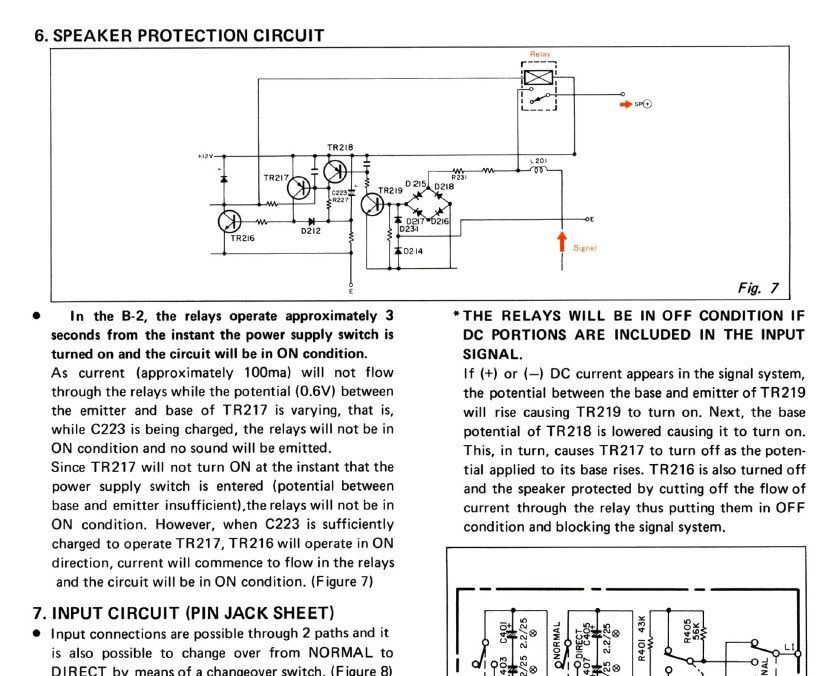 直流アンプなのでどこかが壊れるとスピーカーのコイルも焼き切れるそうです。 直流アンプなのでどこかが壊れるとスピーカーのコイルも焼き切れるそうです。しかしサービスマニュアルを見るとスピーカープロテクション回路は入っています。 DCがコイルに流れるとその電流でパワーを遮断するそうです。 一瞬でドカンと流れ、この回路が遮断する前にコイルが焼き切れたらアウトでしょうね。 今の所管球アンプが動作しているのでB2は出番なしです。 ということでオーディオ周りの簡便レストアーは終わりました。 最近はネットワークオーディオという世界があるようですね。 ipad、spotifyで音楽を聴き始めたらとても簡単です。 時代の流れを感じます。 Someone said that B2 is DC amplifier and when some part was broken, the speaker coil will be burnt out by over current. I fear that but in the manual they wrote that this amplifier has speaker protection circuit. I thought this circuit may protect the speaker coils, unless the sudden explosive over current might burn out the speaker coil in a instance. |