![]()
|
2018-9-28 3D CAD 2 & oil coolant system |
fusion 360が少し使えるようになったので、今回はCAM機能の習得です。
I became to use fusion 360. This time I practiced to use CAM
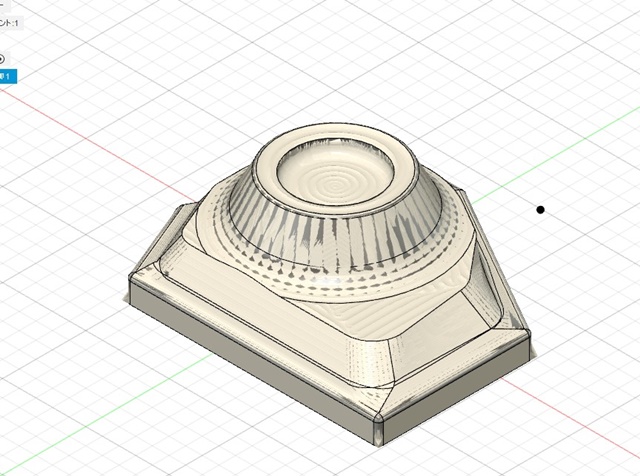
 前回描いたギアーケースカバーをfusion 360 上で切削シミュレーションしてみました。 前回描いたギアーケースカバーをfusion 360 上で切削シミュレーションしてみました。CAD上ですからうまくいきます。これからNCコードを作り、実際の切削に移ります。 CAD 上でできると、何となくできたような気分になってしまいますが、これは思い違いにすぎませんね。これから先もまだまだ大変です。 Simulation cutting on fusion 360. When we could do it on CAD, we have a tendency to thought that we could complete it, but it is not true. We have many problems to solve after it. |
f1000、切込みを3mmというような超高速設定で切削をしましたがそれでも3時間くらいかかりました。 ウレタンなのできれいにできました。 Simulation on Urethane. I set F1000 and plug in rate is 3mm/time but it took over 3 hours. Using urethane I could do it very well. |
6mmエンドミルを使うとなると75+6=81 両脇2㎜しか余裕がありません。 ちょっとでも被削物のセンターと可動域のセンターがずれると可動域を外れ脱調してしまいます。 ということで普通のバイスでの固定では位置がうまく決められません。 このための固定板を作ります。汎用性を持たせるためたくさんの固定用ねじ穴あけが必要でした。 今回初めてタッパーを使ってみました。 設定さえできてしまえば非常に便利な道具ですね~。 数秒でねじが切れ、ちょっと持ち上げれば勝手に逆転してタップが抜けてきます。 今までタップ折れが怖くて使えなかったのですが、こんな優れものとは思いませんでした。 This time the work size is 75mm and the maximum range of motion in Y axis is 85mm, I have only 2mm margin when I use 6mm diameter endmill. I must set the work center just on the motion center, and it is impossible to use the vise, so I had to make fixing plate on the mill table. I started to make the plate. It has many tapped holes and I first use the auto tapper. It took only several seconds to tap one hole. I first knew that it was so fine. |
このための加工を済ませました。つぶししろ15%くらいとしています。 I cut the groove for O ring to prevent the leakage of oil coolant. |
被削物は固定板に裏からねじで固定されます。 この固定板を周囲4か所のねじで上の写真の固定板にM6のねじ度固定します。 Setting plate and test work. Test work is fixed by screw from under surface. Setting plate is fixed by 4 M6 bolts on the fixing plate. |
被削物は固定されていません。 In practice. The work and setting plate was not fixed in this condition. |
受け皿はお菓子の缶の蓋を利用しました。 The parts for oil coolant system. The vat is a lid of the cookie can. |
Oil reservoir. Oil with aluminum chips is first drop into the glass bottle and the chips will sunk the bottom, I thought, But some part floated in the oil and passed this trap. I will have to change this system. |
oil pump |
ちびちびと書けると周りに飛び散りますが、このくらいかけるとほとんど飛び散りません。 In practice |
被削材は7075でかなり硬いものですが切削面は非常にきれいです。この切削面を見ると、たっぷりのオイルクーラントの効果が歴然ですね。今までこんなきれいな切削面は見たことがありませんでした。 後は本番です。 実は一時間くらいしたところでz軸のモーターが脱調してしまいました。z軸は可動範囲の一番下付近で動いているので一部重いところがあるようです。 再調整が必要そうです。 なかなか本番に入れません。 After about one and half hour cutting, the surface is very fine but the motor on z axis stepped out. I had to adjust the movement. On usbcnc the estimated work time is over 30 hours. It was not so easy to cut with machine alone. |