![]()
|
2015-11-9 rocker arm |
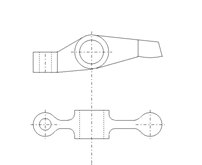
今回はロッカーアームです。寸法的にはうるさくありませんが若干形が複雑です。
This month I made rocker arms.
The contour is somewhat complicated but the dimension is not severe.
 オリジナルはこういう形です。 オリジナルはこういう形です。どうやっても私の2D CNCフライスではうまく切り出せそうもありません。段差だらけになりそう。 むしろ手作業で行くほうがやさしそうでさえありました。 This is the original shape. For may 2D cnc milling machine, it is too difficult to make it. |
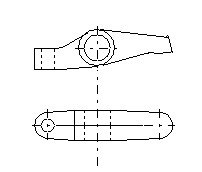
 大はばに簡略化しました。 大はばに簡略化しました。これでも機能的には同じですので。 I changed it into more simple. Functionally it is same. |
手順は今までやってきたのと同じです。 材質はD5、ダクタイル鋳鉄です。 Turn 50 mm diameter nodular cast iron. |
一番下は欲張って3個取ろうとしてふちが切れてしまった失敗作です。 材料は一部噛み込んで傷がつきました。 2 test pieces and materials. |
| Adjusting the thickness. |
| これがねずみ鋳鉄だと細かい粉状になります。 この粉状のきりこを嫌ってダクタイル鋳鉄を選びました。 機械にはめちゃくちゃ悪そう。 何しろきりこも機械も鋳鉄ですから・・・・とも擦り状態。 細かい粉なのでどこにでも入り込むし。 Lathe chip becomes spiral becase of nodular cast iron. |
最近はなれたせいもあり作業中も放置しておいても大丈夫。 CNC milling is completed. |
タブのところで刃物が上下するので切削痕が残ってしまいます。 切削痕が残ると言うことは直線部では若干刃物が逃げているんでしょう。 Just after cutting the tab. You can see roughness on the cut surface. |
この段差修正は鉄鋼やすりが一番効率的ですね。 File out by hand. |
| 10度傾けます。傾いているのでエンドミルであけています。 原図では直角にあけて後からねじりをくわえています。 設計変更したため、それは出来ないのであらかじめ傾けて穴あけしました。 Drilling the hole for tappet adjusting screw. The hole is not perpendicular so I used endmill. |
Fixture for round cut. |
finished |
another side |
この部分はきりこがかむ心配がないので吸引装置が稼動しています。 finished |
There is a hollow too. |
revision by file. |
一瞬ですね。 To remove the scratch by file, belt sander is the fastest way.(#400) |
| これより荒いと次に使うスコッチブライトでやすり目を消すのが大変。 #320では時間がものすごくかかる。 試行錯誤の結果得られた方針です。 この後スコッチブライト7447,7448で仕上がりです。 The part where I can not use belt sander, I used #240 sand paper. If I used more rough sand paper, it becomes very difficult to erase the scratch by Scotch Brite 7447. If I used #320, it will take very long time to erase the file scratch. After this procedure, I polished with 7447 and 7448 Scotch Brite. |
| ちなみに中心穴はCNCであけて、リーマーを通してあります。 図面上で7φ 実際は6.9くらいであき、リーマー通しにぴったりにあきました。 Completed. |
| これらはロッカーカバー内に収まるので見えるのは今だけです。 It is only now when you can see them. They are hidden in the rocker box. |