![]()
|
2009-9-14 crank shaft, recovered |
前回失敗したクランクシャフトです。失敗の主な原因(その他細かい要因が折り重なっていたようです)は後側チークの穴が直角にあいていないということでした。
前側チークと後側チークを完全に同心に穴をあける方法が思いつかず、いったんはあきらめましたが、何とか思いつきました。
それが下の方法です。
I tried to repair the former crankshaft.
The main reason of the failure is not true the hole of rear crank cheek. At the beginning I could not found to bore the cheek
coaxially with the front cheek.
I thought it every night and found to do it.
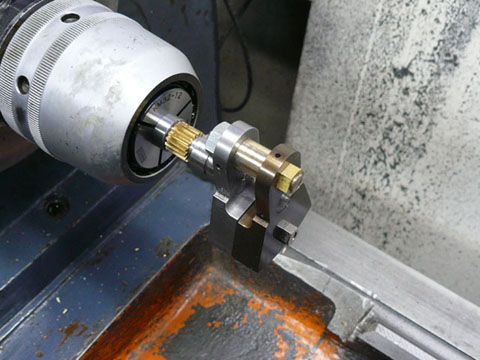 前側クランクチークに同心になるようにジグを使って固定して穴を再度開け直しました。 前側クランクチークに同心になるようにジグを使って固定して穴を再度開け直しました。リアー側軸は作り直しました。 これを普通の状態に戻したのですがやはり芯がふってしまいました。 前側チークの軸に対する直角度もあまり良くないようです。 後側だけが斜めに穴があいてしまったのだと理解に苦しむのですが、前側も同じとわかると原因がつかみやすく少し安心しました。 加熱したので後側チークは変色しています。 First I fixed the rear cheek on the front cheek with two shaft. Then I bore up the rear journal hole. I made new rear journal too. When I assembled, it was not true. The hole of front cheek may be not true. |
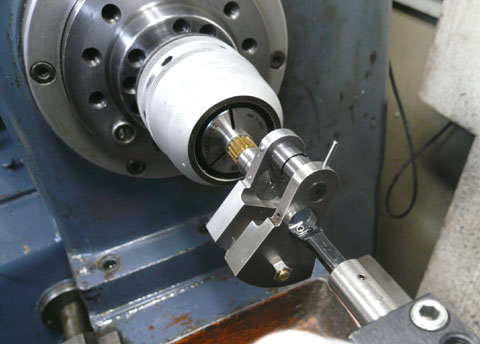 上の方法では駄目なので、正規の状態に組んだ上で再度穴を開け直しました。 上の方法では駄目なので、正規の状態に組んだ上で再度穴を開け直しました。当然上の状態で作ったシャフトは使えません。シャフトもまた作り直しました。 I tried another way. I made another rear shaft again. |
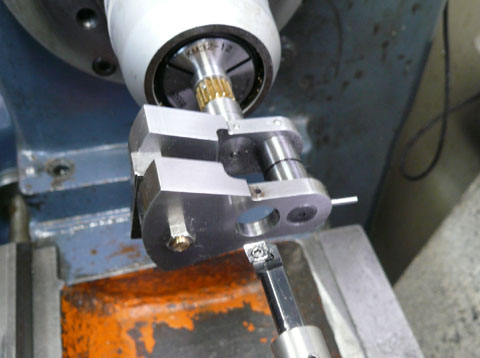 ボーリングが終わりました。 ボーリングが終わりました。Finished. |
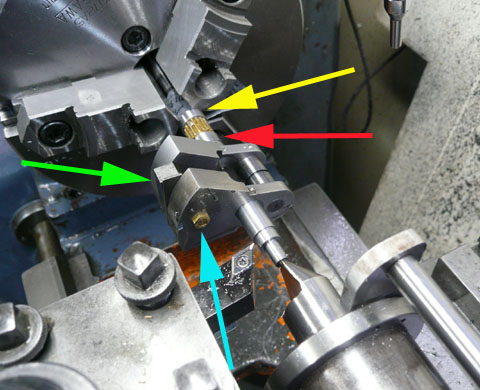 この段階では上の画像と比べるとわかるかと思うのですが軸をスクロールチャックでくわえています。 この段階では上の画像と比べるとわかるかと思うのですが軸をスクロールチャックでくわえています。その理由は 黄矢印と赤矢印で示す部分は別部品で作られています。そして黄矢印部分は把持部と同一部品です。コレットで把持すると黄矢印部は全く芯ぶれ無しで把持できるのですが赤矢印部が0.03くらい振ってしまいます。実際に組み付けるときは赤矢印部分がメタルベアリング、その他はボールベアリング把持。メタル部分の同心性が一番重要になるので赤矢印部が完全に振れが無くなるようスクロールチャックを使いました。三爪スクロールチャックですが、固定ネジを少しゆるめてハンマーで軽くたたくことで0.03の振れは0にできます。(コレットは全く融通が利きません。) こうやってセンター押しをして後側軸をチークに固定してから切削しました。 ところが青矢印で示す固定ネジと緑矢印で示すゲージブロック10.07mmをはずすと0.05くらい芯ぶれが出てしまいました。このレベルだと実際にクランクケースに組み付けると何とか問題ないレベルでなのですが納得行きません。 要するに前側チークの精度の悪さが次々と不具合を呼び込んでしまうようです。 頼んであった材料が来ましたのでもう一度初めから作り直します。 In this picture I did not use the collet. The parts indicated by yellow arrow and red arrow are different. When they were fixed on the collet, the parts shown by yellow arrow is completely coaxial but the parts indicated by red arrow show the 0.03 swing. The pars indicated by red arrow will be supported by metal bearing, so the coaxially of this part is most important. On the collet, it was impossible to absorb it. So I used the scroll chuck and the scroll chuck can absorb the 0.03swing ,when the fixing bolt are slightly loosen and knocked gently by rubber hummer. Then I turned the rear journal with tail center. When I removed the bolt indicated by blue arrow and gage block 10.07mm, the rear journal show the swing about 0.05mm, This level of swing is permited on the crank case with front and rear bearing housing, but I could not get satisfaction In a word the not true the front cheek hole effect every thing! I received another material today, I will make it again. |
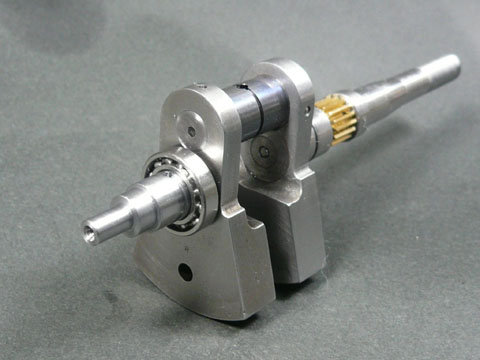 一応何とか使えるレベルになりました。 一応何とか使えるレベルになりました。I can use it but...... |
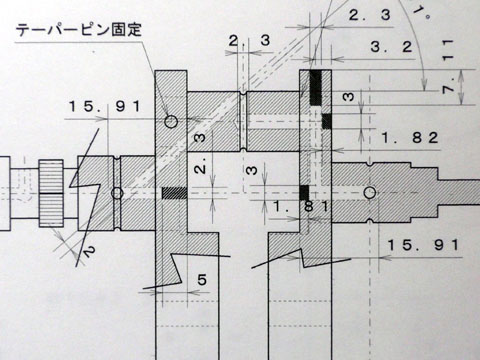 オイルパスはこんなふうになっています。 オイルパスはこんなふうになっています。Oil path |
| 軸やその端面の直角度は旋盤作業なので疑う余地もありません。問題が起きるとしたら穴でしょう。 その穴も旋盤作業であけてあるので考えられるのはチャッキングの時に斜めになったか、遊びがあって斜めになったかのいずれか。遊びはほとんど無いので、穴あけが原因なのでしょう。 今度のは細心の注意を払ってみます。 一ヶ所ずれてしまったものは、他部位でその誤差を吸収するのは至難の業だということがわかりました。 The only one fault effects every thing and it is very very difficult to absorb the fault by another parts. |