![]()
|
2012-03-30 assemble-1 |
明日でスタートしてから3年です。途中ハンドランチグライダーにはまり、進行が大幅にゆっくりになりました。ようやっと組み付けをはじめました。
3 years have passed since I started radial 9. I made several hand launched
gliders so the progress became slow.
Finally I can start to assemble.
 キャブレター取り付け部アダプターです。 キャブレター取り付け部アダプターです。フランジ部分が大きいのでは一塊削り出しを止め接着方式にしました。 r部分は手作業です。 リアーカバーが鋳物でr部分が完璧な形をしていません。これに合わせて作っていますので少しいびつです。 Adaptor for carburetor. |
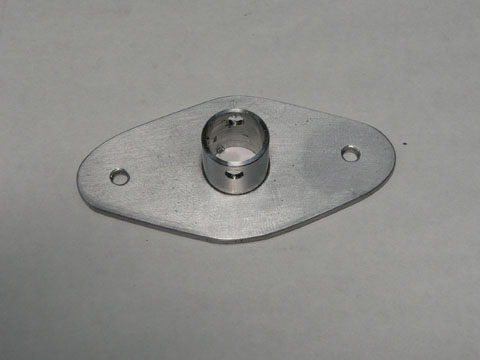 完成です。 完成です。finished. |
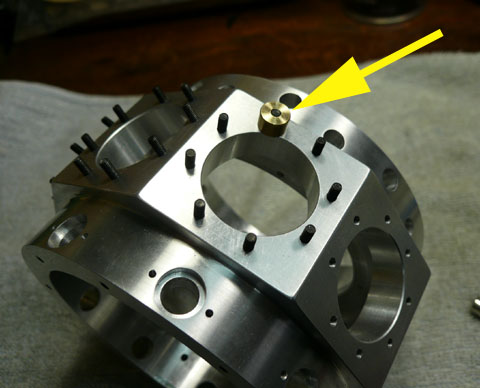 シリンダー取り付け用スタッドボルトを固定しています。ロックタイト290(中強度)を使いました。M2.6なのでかなり強固な固定になっていると思います。実用エンジンでは多分272を使うのでしょうが、永久固定用はちょっと心配で一応取り外しも考慮しました。 シリンダー取り付け用スタッドボルトを固定しています。ロックタイト290(中強度)を使いました。M2.6なのでかなり強固な固定になっていると思います。実用エンジンでは多分272を使うのでしょうが、永久固定用はちょっと心配で一応取り外しも考慮しました。Gluing the stud bolts with LOCTITE 290 using the jig(yellow allow) |
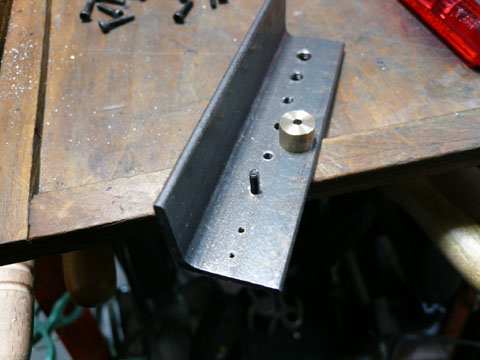 スタッドボルトはこんな感じで作ります。(再掲になります) スタッドボルトはこんな感じで作ります。(再掲になります)長さが不揃いだと目立ちます。真鍮の部品は長さ揃えようのジグです。 Making the stud bolt with Bob's Bobber (Construction tips ans advice from Bob Shores,Tip 11 http://www.floridaame.org/HowTo.htm) |
 突出長さを決めます。 突出長さを決めます。板厚が2.5mmありますので、このジグはその分を差し引いて作ってあります。 ちなみにこのアングルはM6からM1.7まで使えるようになっています |
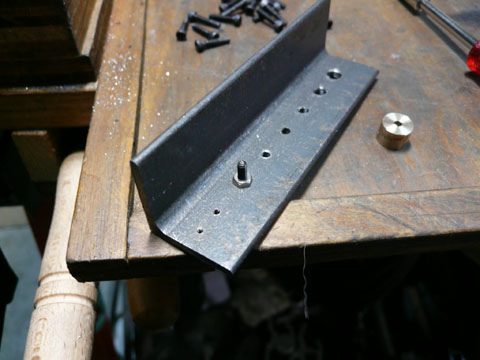 ダブルナット(アングルにもネジが切ってあります)にして切断時に回らないようにします。 ダブルナット(アングルにもネジが切ってあります)にして切断時に回らないようにします。 |
 バイスで固定して弓鋸で切断します。 バイスで固定して弓鋸で切断します。 |
 90°回して、切断部分のヤスリがけをします。 90°回して、切断部分のヤスリがけをします。 |
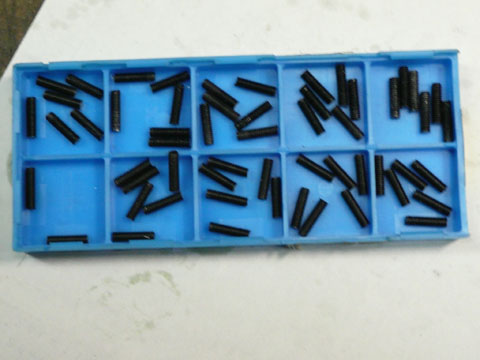 1シリンダー当たり8本、合計で72本出来ました。 1シリンダー当たり8本、合計で72本出来ました。72 stud bolts |
 クランクシャフトにマスターロッドを組み付けます。下に見えているのは固定用のテーパーピンとそれを打ち出すためのポンチです。 クランクシャフトにマスターロッドを組み付けます。下に見えているのは固定用のテーパーピンとそれを打ち出すためのポンチです。Assemble the master rod to the clank throw. |
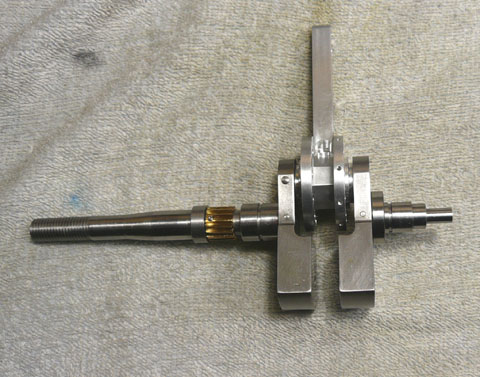 組み付けました。 組み付けました。Assembled. |
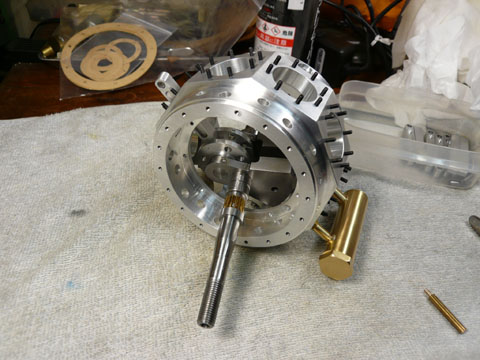 これをクランクケースに組み込みます。マスターロッドは一番シリンダーに入れます。 これをクランクケースに組み込みます。マスターロッドは一番シリンダーに入れます。この時点でオイルサンプは既に組み付けてあります。原典ではこれはロウ付けをしてしまいますのではずせなくなります。 Place the crankshaft with the master rod in the middle of the crankcase. The oil sump was already installed in the crankcase. |
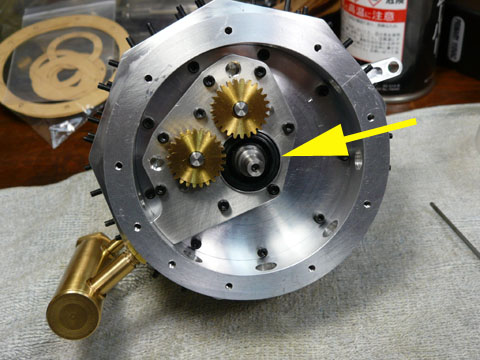 オイルポンプを組み付けてあるリアーメインベアリングを組み付けています。 オイルポンプを組み付けてあるリアーメインベアリングを組み付けています。黄色矢印で示しているのはオイルシールです。 The rear main bearing with the oil pomp was installed. The yellow allow shows the O ring. |
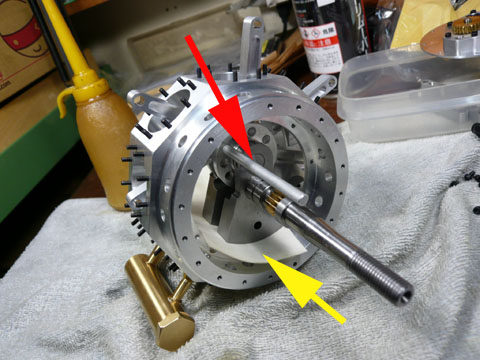 スレーブロッドの組付けです。赤矢印で示したガイドを使ってリストピンを入れ、M2ネジを使って固定します。本来はリアーメインベアリングを入れた状態でこの作業が出来るのですが、私の場合リストピン固定ネジ穴を後ろ側に切ってしまったためはずさないと出来なくなりました。リアーベアリングをはずしてあるためクランクシャフトがクランクケース内で遊んでしまいます。鋳鉄のクランクスローがクランクケースを傷つけないため厚紙(黄色矢印)をしいて保護しています。 スレーブロッドの組付けです。赤矢印で示したガイドを使ってリストピンを入れ、M2ネジを使って固定します。本来はリアーメインベアリングを入れた状態でこの作業が出来るのですが、私の場合リストピン固定ネジ穴を後ろ側に切ってしまったためはずさないと出来なくなりました。リアーベアリングをはずしてあるためクランクシャフトがクランクケース内で遊んでしまいます。鋳鉄のクランクスローがクランクケースを傷つけないため厚紙(黄色矢印)をしいて保護しています。Add the 8 slave rod onto the master rod using the aluminum guide rod(red allow) and protecting paper(yellow allow). |